Friday, July 5, 2013

Feathers of Fancy

I've been working on a furniture project with a big dose of kelly green. As I was thinking of some colors to coordinate with that bold green I came across this picture. I've already got a lot of blue and grey/silver in my house so these colors are just perfect!

Image via Pinterest

Tuesday, May 14, 2013

Ring Around the...Evergreen Tree

Our front yard has been bugging me ever since we moved in last October. Unfortunately the inside of our house was in need of so many fix-up projects that we largely had to just ignore the outside of the house until now, when we are (mostly) completed with the indoor projects and Spring and (relatively) sunny weather has returned to Newfoundland.

We did however paint the front door back in October, which you can read about here. It used to be this sad light blue shade of rusty-licious, and we brightened it up with a bold shade called "Daring Indigo." That, unfortunately, is where we stopped as far as the exterior goes, until now.

After some thorough instructions from my mom (aka gardener extraordinaire), we built up a raised bed around the base of our tree with some old (aka free) cinder blocks we found under our deck. Then we filled them in with dirt and planted some Hosta bulbs. The kids loved helping in the "garden."


The Hosta's I planted around the tree (the Frances Williams in the large picture, and the Siebaldiana Elegans in the top right corner):

The cinder block ring:

Lincoln and I staking out where each bulb will go:

Filling in with Dirt:

Watering our bulbs:

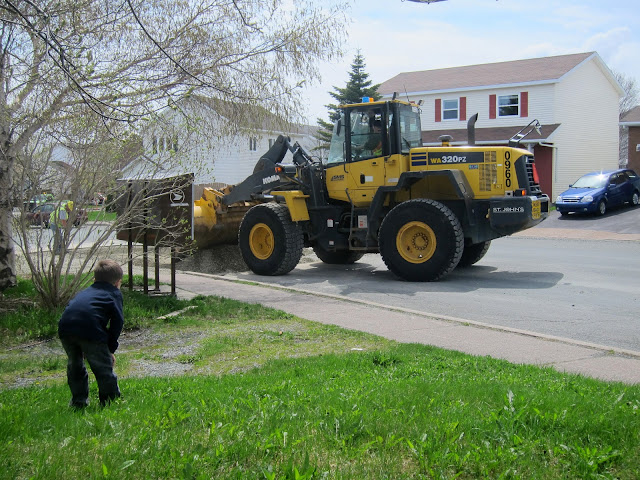
We took a little break at this point because we ran out of dirt, and Lincoln wanted to watch the big back loader right beside our house at work.

Later when daddy got home from work and brought us more dirt we finished filling in, and then topped it off with some mulch.

Scarlett had a grand time digging around with her little cultivator.


There are six Hostas planted, you can see the tops just barely sticking up through the dirt.

Our next outdoor project is to do another raised bed just behind and to the right of this one, underneath the bay window and the surrounding area which is also quite awful right now. But for today I'm quite pleased with our little plants. I can't wait for them to really start showing.

Thursday, April 18, 2013

Gallery Wall

I've been buying ugly art canvasses on clearance at HomeSense with a project in mind for a large empty wall in my family room. It's going to be a collection of quotes, photos and art that are meaningful to our family.

Here's a peek at one of the quotes I'm using:


(Originally I found a similar one to this on Pinterest which I loved, but the colors didn't quite work with my plan. I also discovered that it was slightly misquoted, so I made up my own in Publisher. Here's the talk it came from in entirety)

I'm hoping to finish off the other canvasses this weekend. I'll post up the rest when it's done.

Wednesday, April 17, 2013

SLC Temple

This is quite possibly my new favorite picture of the Salt Lake Temple. For an upcoming project I was looking for a great print of the Temple, and I had originally found another. Unfortunately when I tried to contact the photographer to ask about purchasing a digital copy of it that I use to print from I never heard a reply. Her loss. I found this one instead, which I love even more. Aren't those tulips so beautiful? It just makes the Temple look like a magical palace, and reminds me of the way it looked when my husband and I got married there in the spring almost 7 years ago. I'll tell you though none of our wedding pictures came out this good (sadly, being poor college students we cheaped out on a photographer and have regretted it ever since).

 
Salt Lake City Temple in the Spring, by Scott Jarvie found here. I'm not being paid to say this, but he's got a lot more really beautiful temple prints as well, and he allows free downloads for personal computer use. What a doll! I actually wanted a hard copy print to use in a project so I purchased a digital download from his site.


Wednesday, February 20, 2013

Mexican Star Pinata

For my son's 5th birthday we had a Mexican fiesta theme. I wanted to make a pinata and let him choose the style. Lucky for me he chose the traditional star shape which looks great and is fairly simple to create.

I wanted a perfectly round ball, so I bought a punching balloon from the dollar store. It blows up pretty big, so I ended up with quite a large pinata. The make the points of the star I cheated a little and used birthday hats (If you want a longer point then you can roll of newspaper into a cone shape).

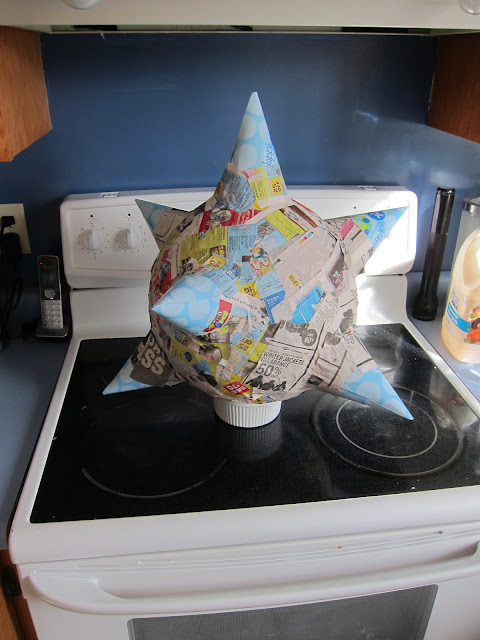
After adding several layers of papier-mâché to my balloon, and letting it dry completely, I added my hats.


I started with one on top, and then about a third of the way down the balloon (longitude)  I added three more (just imagine a triangle shape when you are looking directly down on the pinata/bird's eye view). Then at about two-thirds of the way down I added three more hats with my "triangle" shape rotated slightly from the one above so they pointed out evenly in different spots on the pinata. (Sorry if this sounds very confusing!) To attach the hates you can either use hot-glue, or more strips of papier-mâché (that's what I did). There is no hat at the very bottom of the pinata, because it will actually get flipped up-side down and have a hole for the candy there.

After the hats were in place and dry, I popped the balloon inside, and made the opening a little bigger, and then attached string.

Next for decorating I decided to use a variety of colors. I have 7 cones, and wanted each to be a different color.

I started by decorating all the cones. I cut 4-5 inch lengths of streamers, with snips cut into them to make a fringe. Then, started at the tip I used more papier-mâché paste to attach them, wrapping them around the cone. overlapping slightly and working my way down to the base of each cone. 

For the body I cut lots of little squares from each color and then stuck them on with the paste in little clusters of color.

 A view from the bottom of the pinata.

I also added some skinny strips of streamers at the point of each cone. It's really pretty when the pinata swings on it's rope with the fluttering steamers! (sorry this isn't a great photo, I forgot to take one before the party started).

Thursday, February 7, 2013

Cake Number 5

I'm really not much of a cake decorator. I want it to look good and all (things always taste better that look pretty, am I right?), but I just can't really get behind the idea of spending hours to decorate something that will be eaten in about 2 minutes by a bunch of unobservant five year-olds. When I saw this idea, I knew it was the cake for me! Simple and cute.

Once again, sorry for the poor quality pictures, I decorated this right as the guests were arriving (which is why this cake idea is so great, it only takes a few minutes to do), so I didn't have a chance to get a great picture of it.

Basically you ice the cake, the lay a piece of paper, whatever number or letter you're using in the center and carefully spoon the sprinkles all over the exposed icing. I learned pretty quick to just do a few sprinkles at a time, or else they just bounce off the cake and all over the counter. It helps to gently squish them into the icing too, so they stay in place. After the cake is covered remove the paper template and you're done!


Here's the birthday boy!


Friday, February 1, 2013

Diaper Cake

I made my first diaper cake this week. I like the simplicity of it. I didn't know the gender of the baby, so I tried to keep it pretty neutral. I can't believe how tricky it is to make these things, but I'm really happy with how it turned out.